


In this tutorial, we demonstrate how to use KeyMaster G3 to read and write Toyota GEN3 ECU data with chip model R7F701216 in BENCH mode.
Tools Required
OBDSTAR G3
High-Power DC Regulated Power Supply
OBDSTAR Main Cable
Jumper Wires
MP001 Programmer
Toyota ECU (R7F701216)
Before starting, make sure KeyMaster G3 software is updated to the latest version.
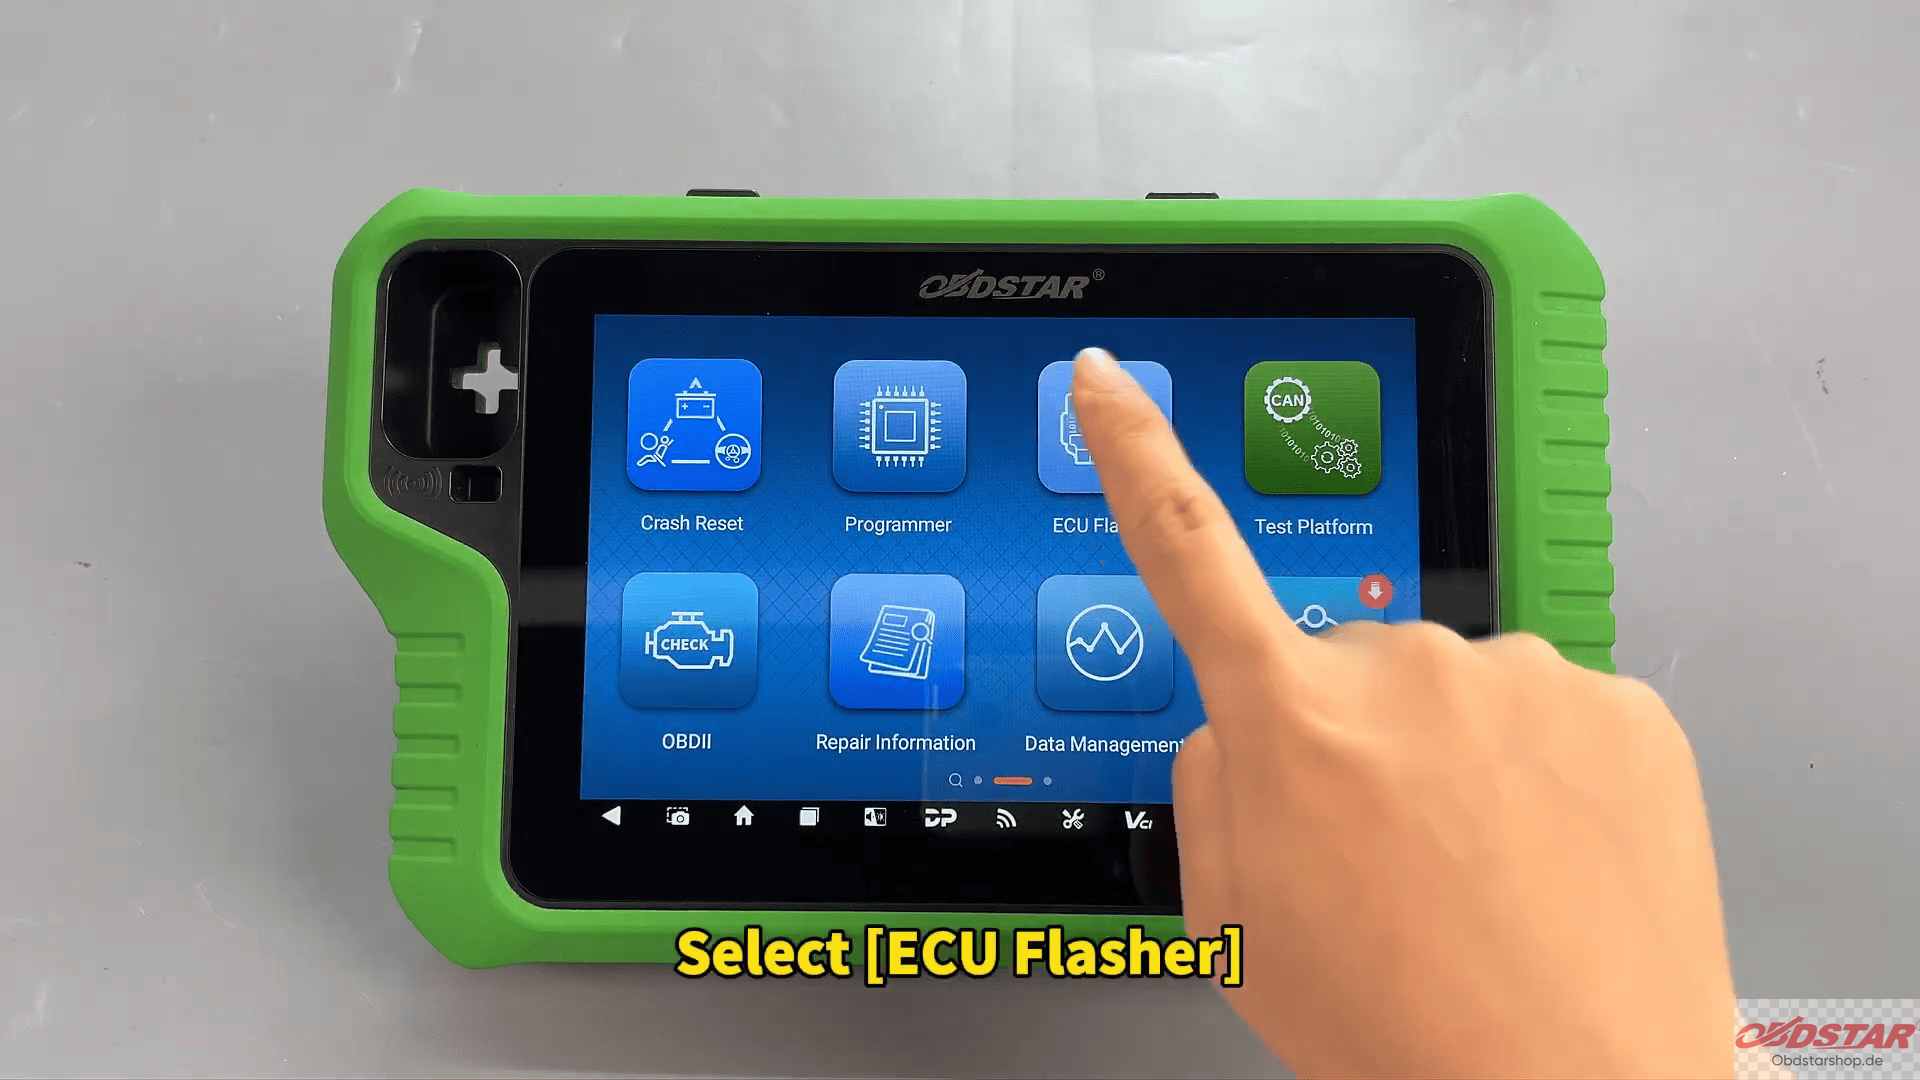
Step 1: Enter ECU Flasher
Open the device and select:
[ECU Flasher] → Passenger Car Engine
Choose the correct software version and search for the ECU model in the top-right corner.
Step 2: Check Connection Diagram
Tap [Guide] to view the wiring instructions and connection diagram.
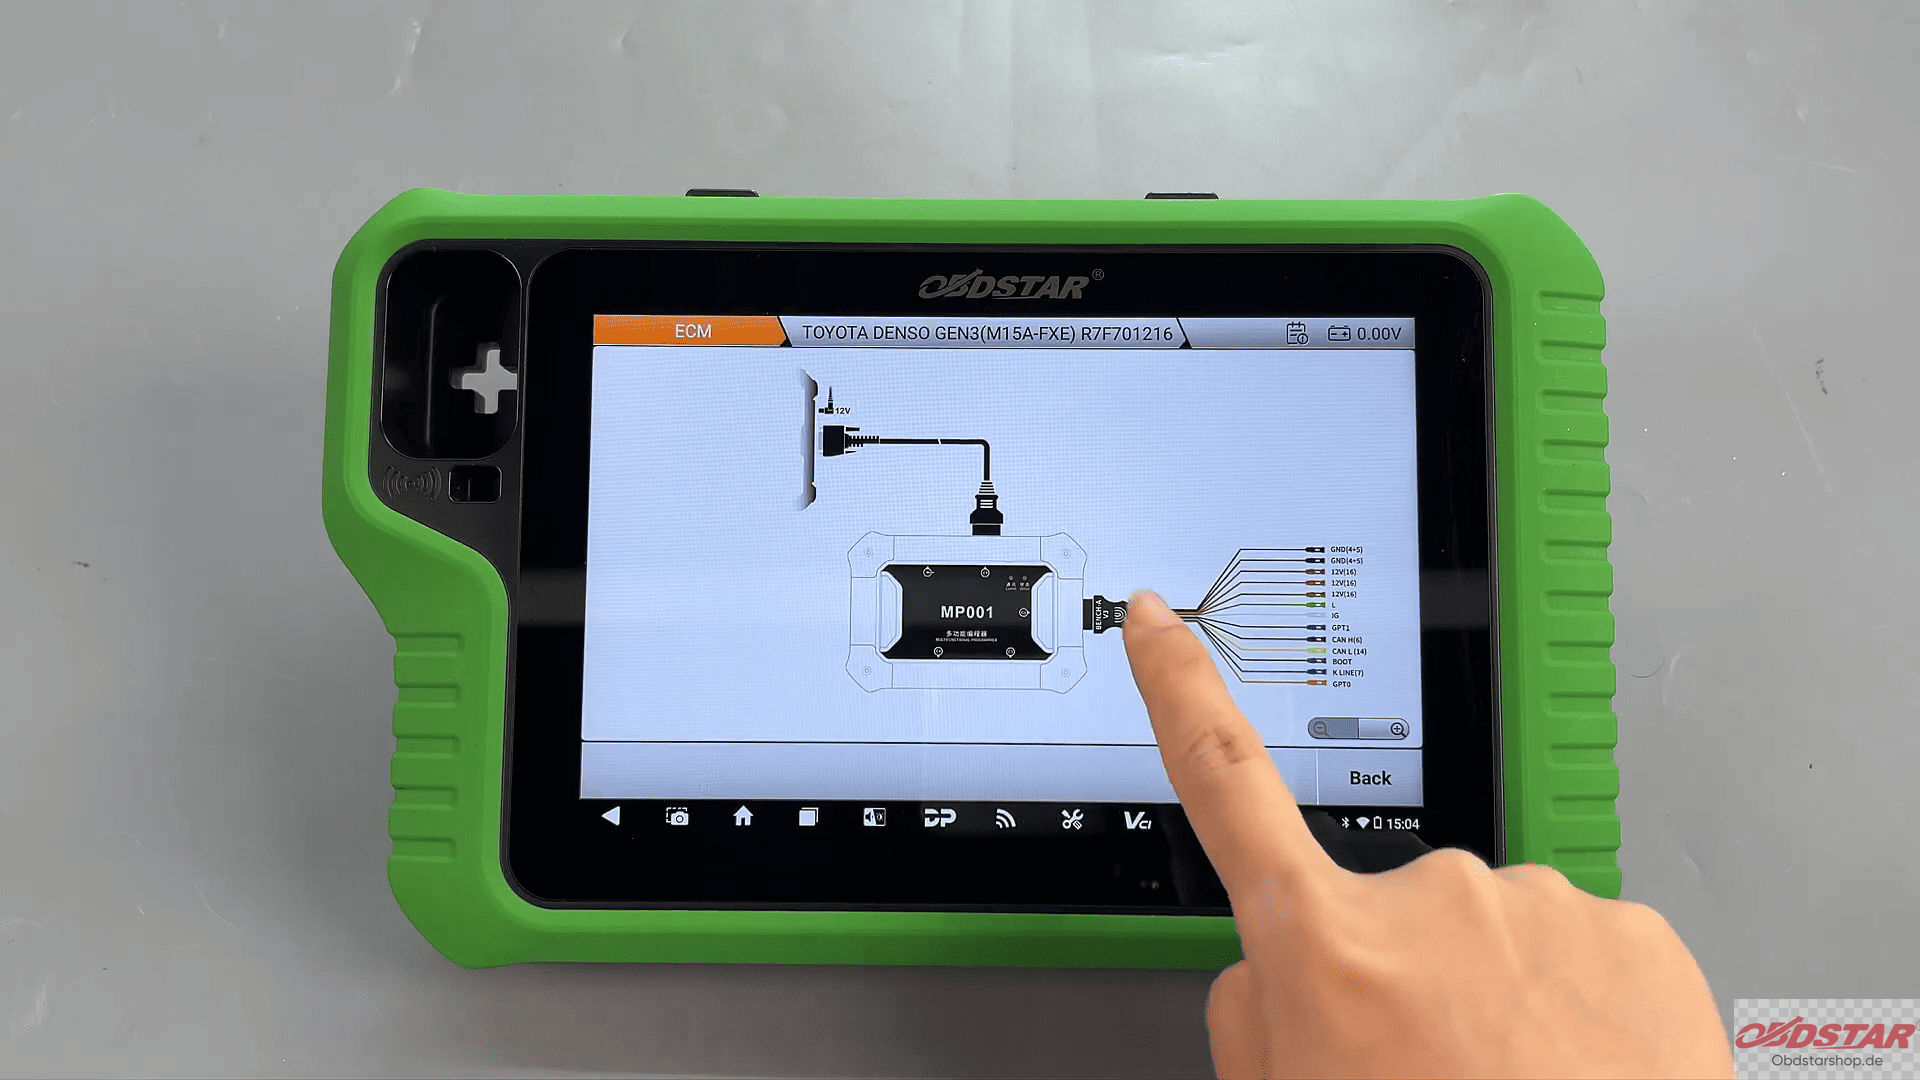
Then return and enter:
[Pinout] → BENCH Mode → MP001
Confirm the ECU appearance matches the selected model.
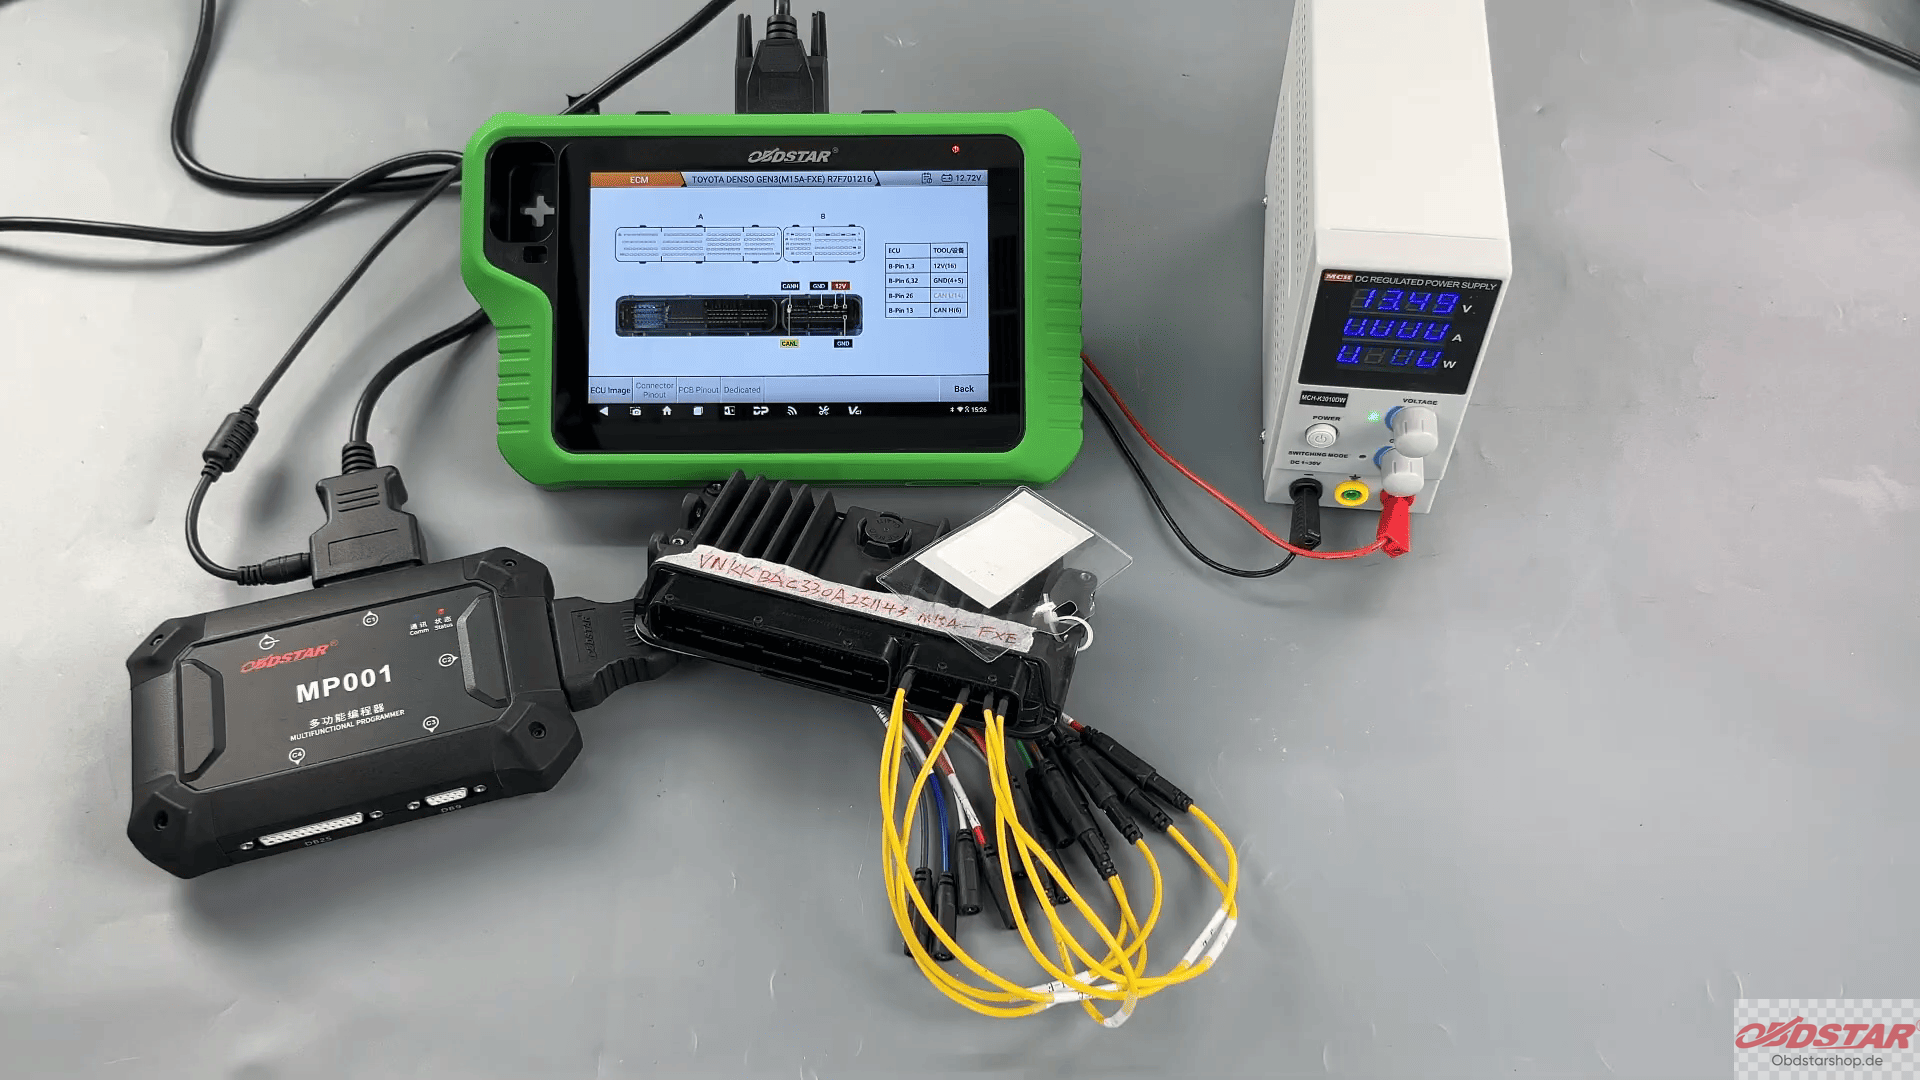
Step 3: Connect the ECU
Open [Connector Pinout] and connect all cables according to the diagram.
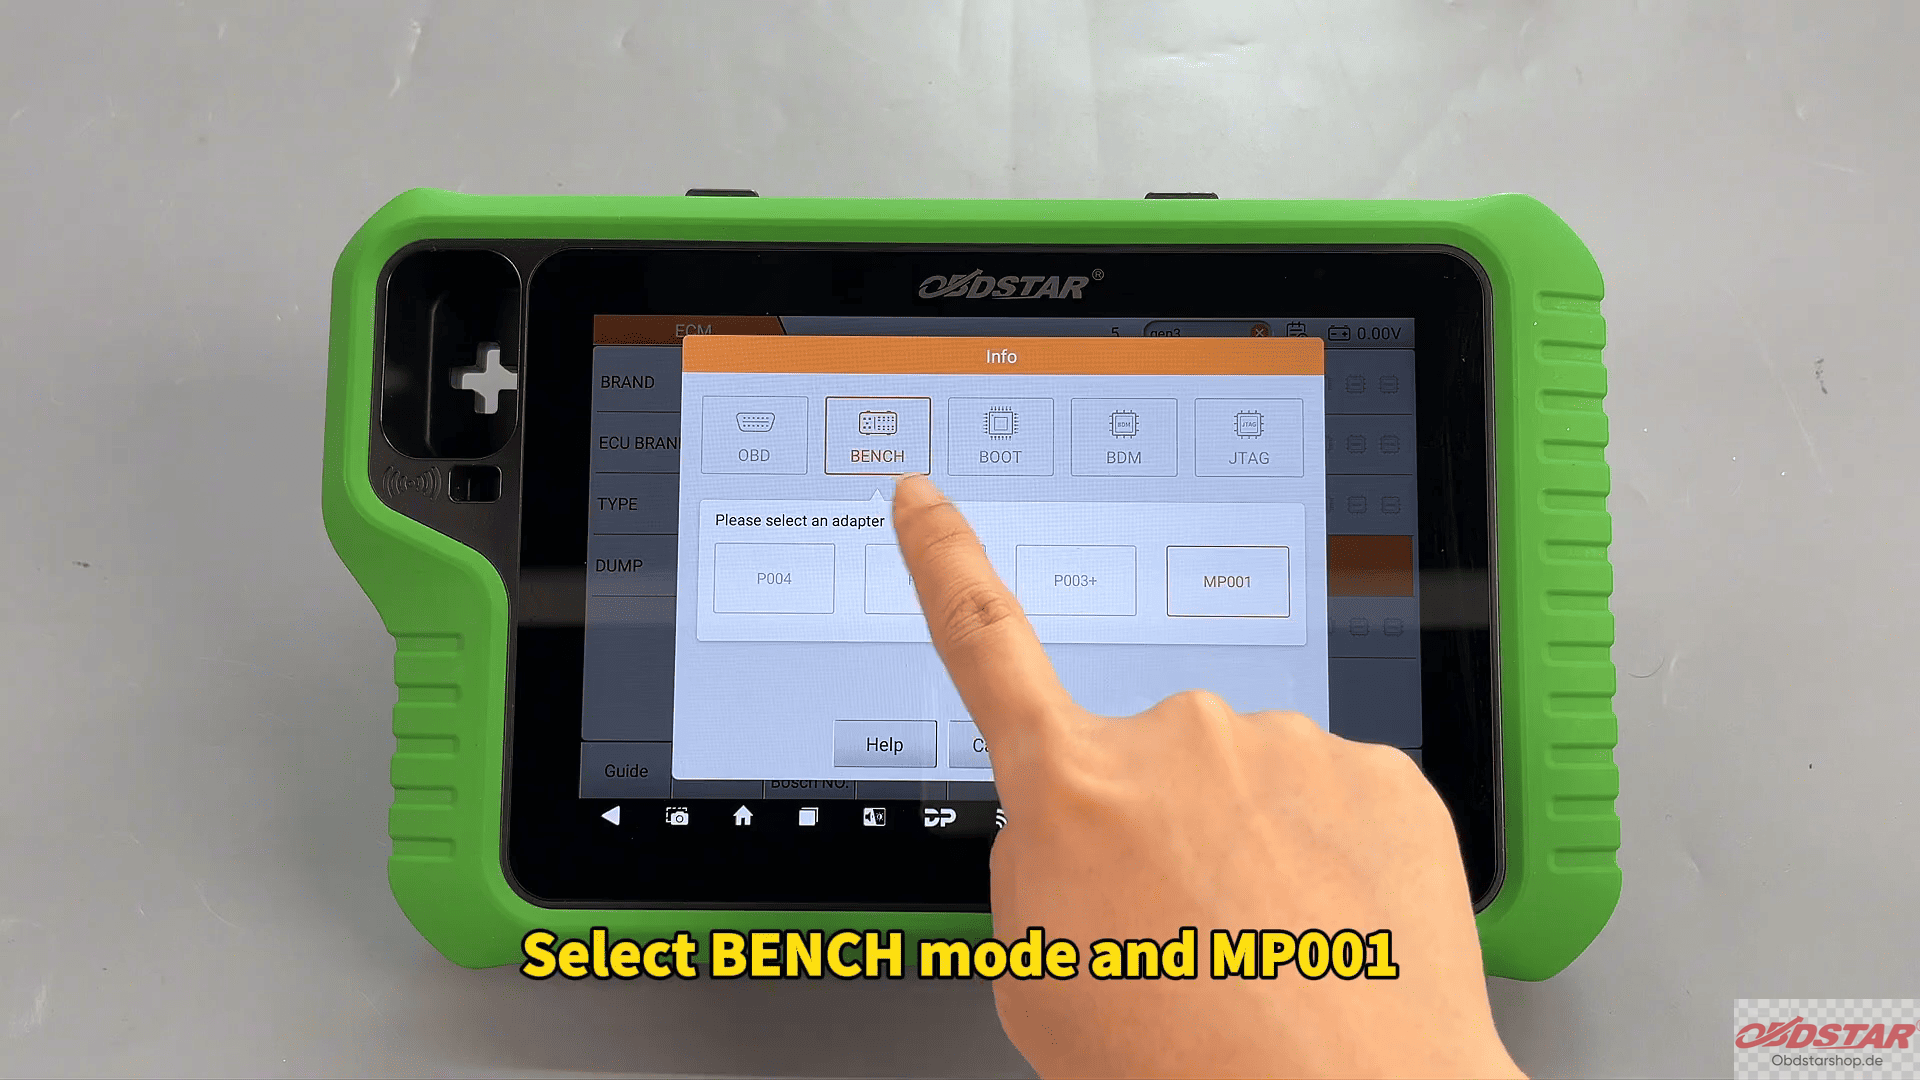
Once wiring is completed:
Tap [Back] → [Start]
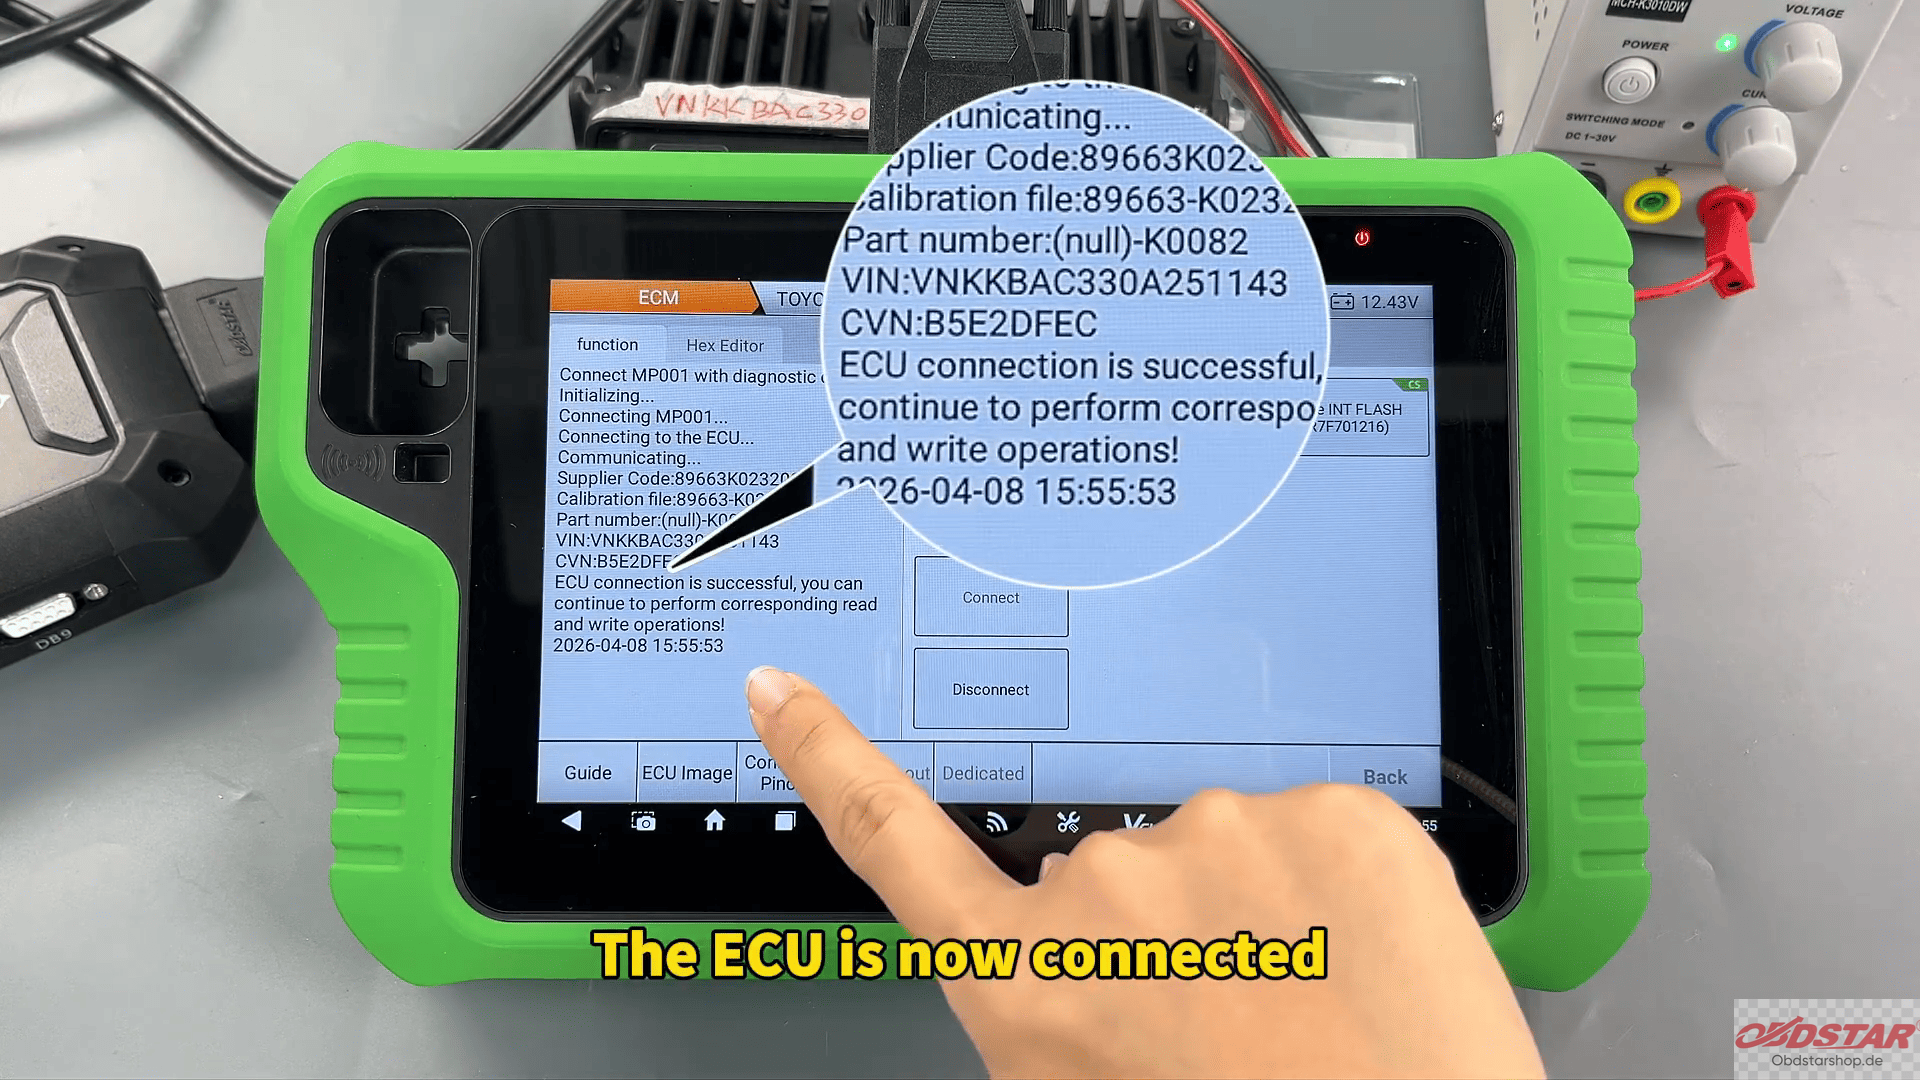
Select BENCH Mode + MP001 and tap [Connect]
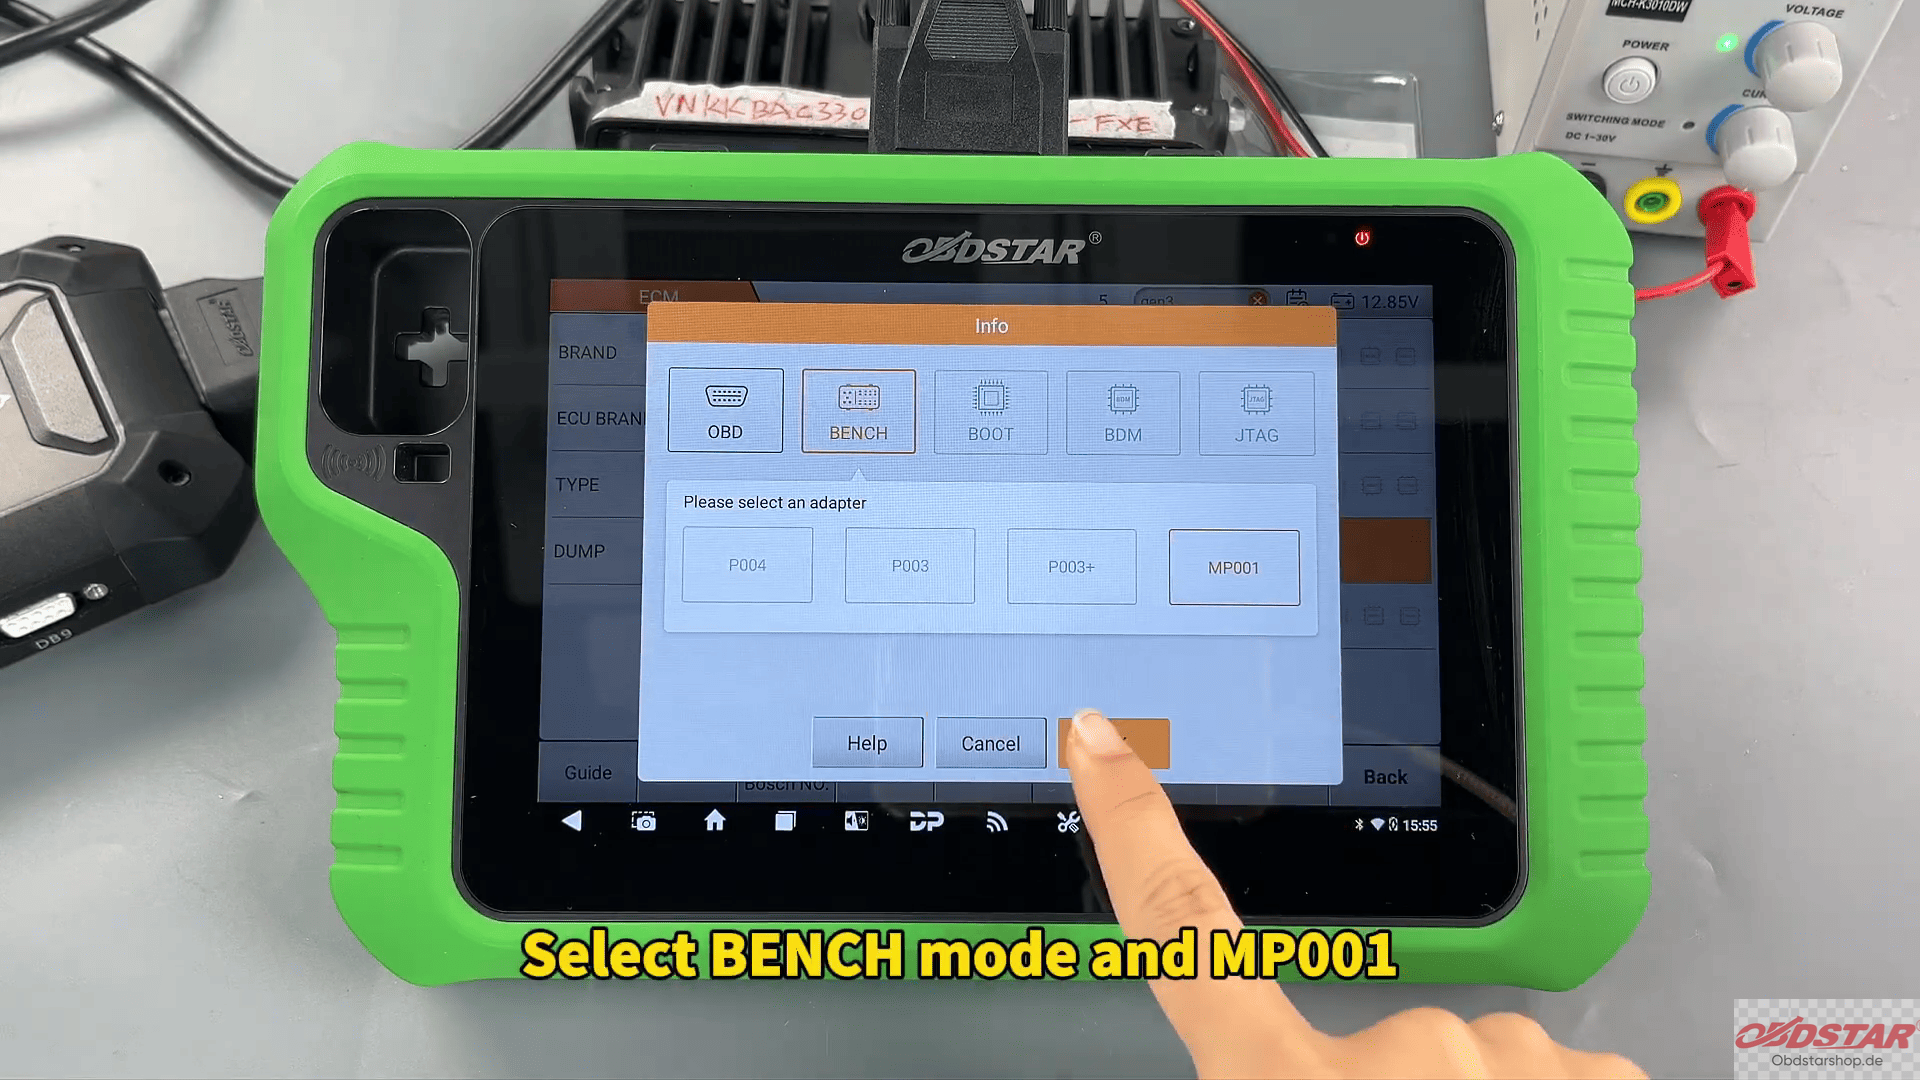
The ECU will now connect successfully.
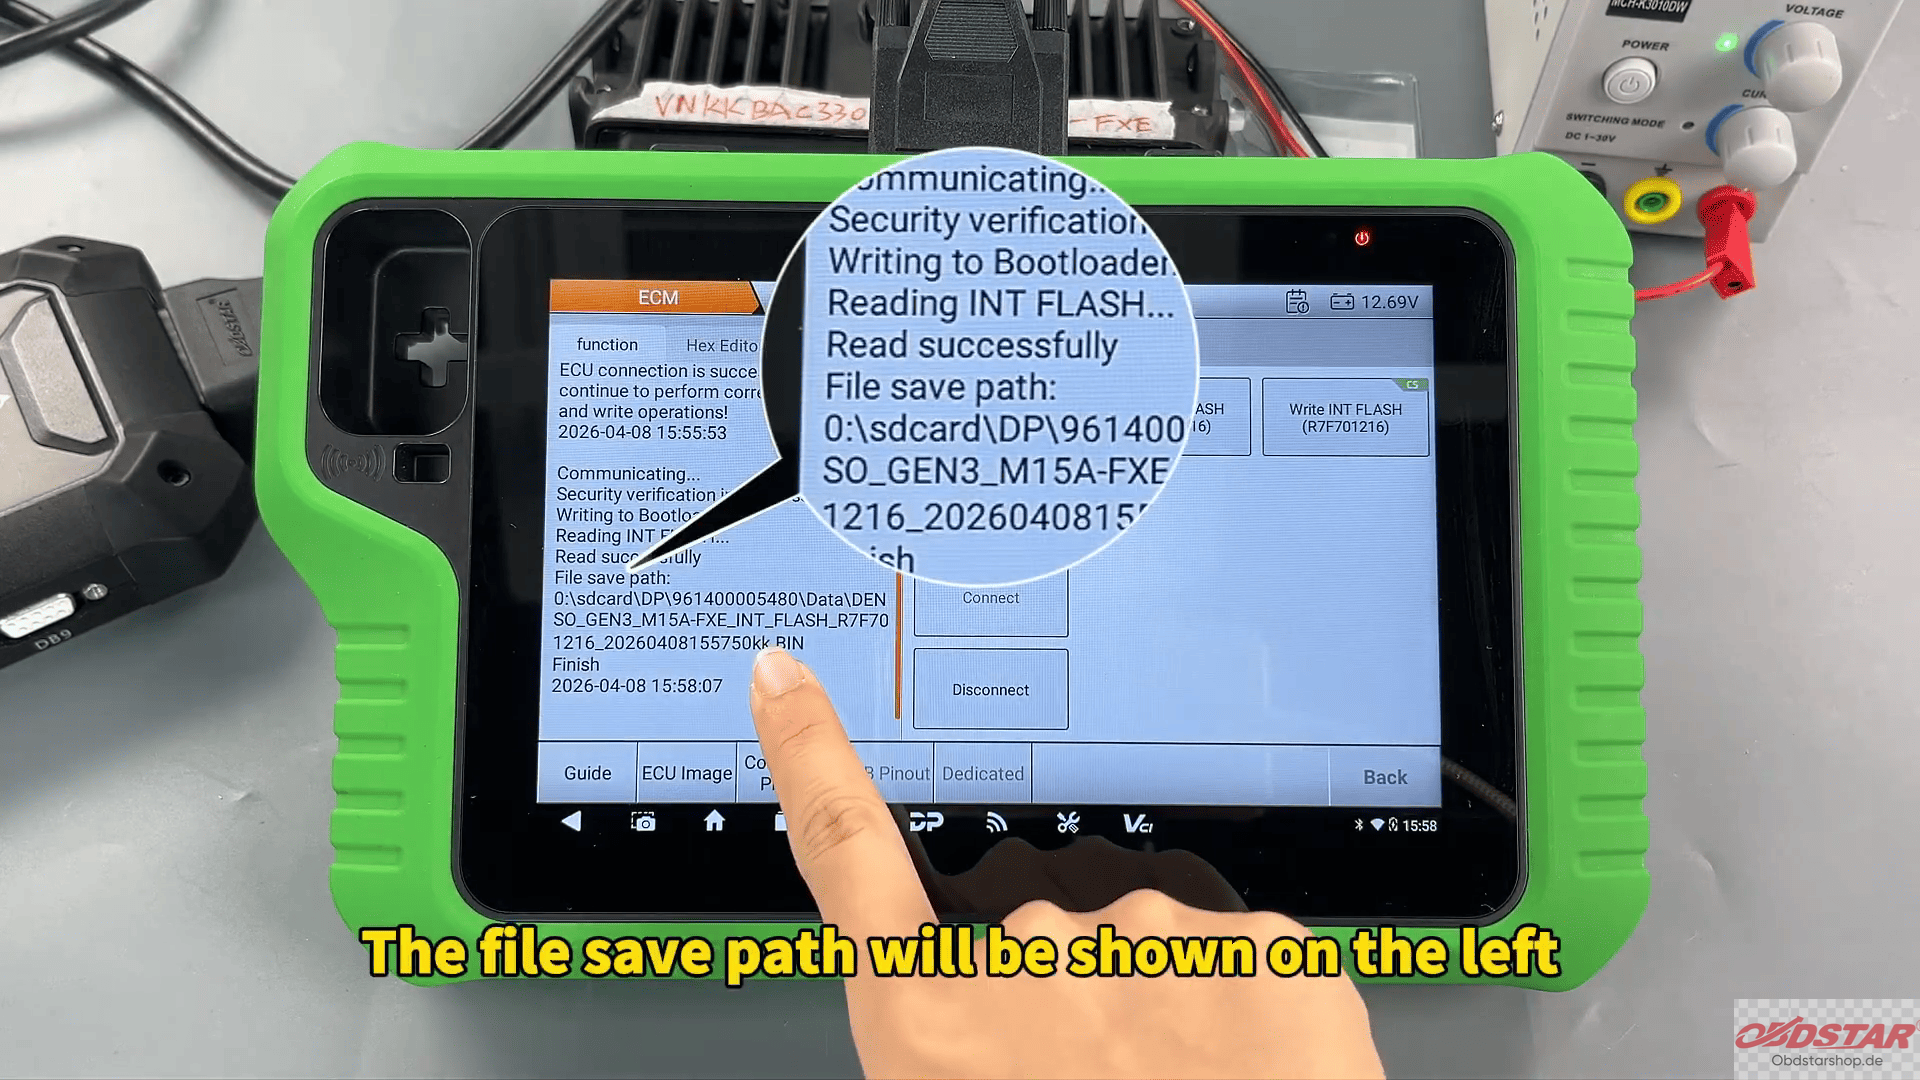
Step 4: Read FLASH Data
Select Read FLASH to back up the original ECU data.
You can rename the backup file as needed, and the save path will be displayed on the left side of the screen.
Tip:
The “CS” icon in the top-right corner indicates checksum support.
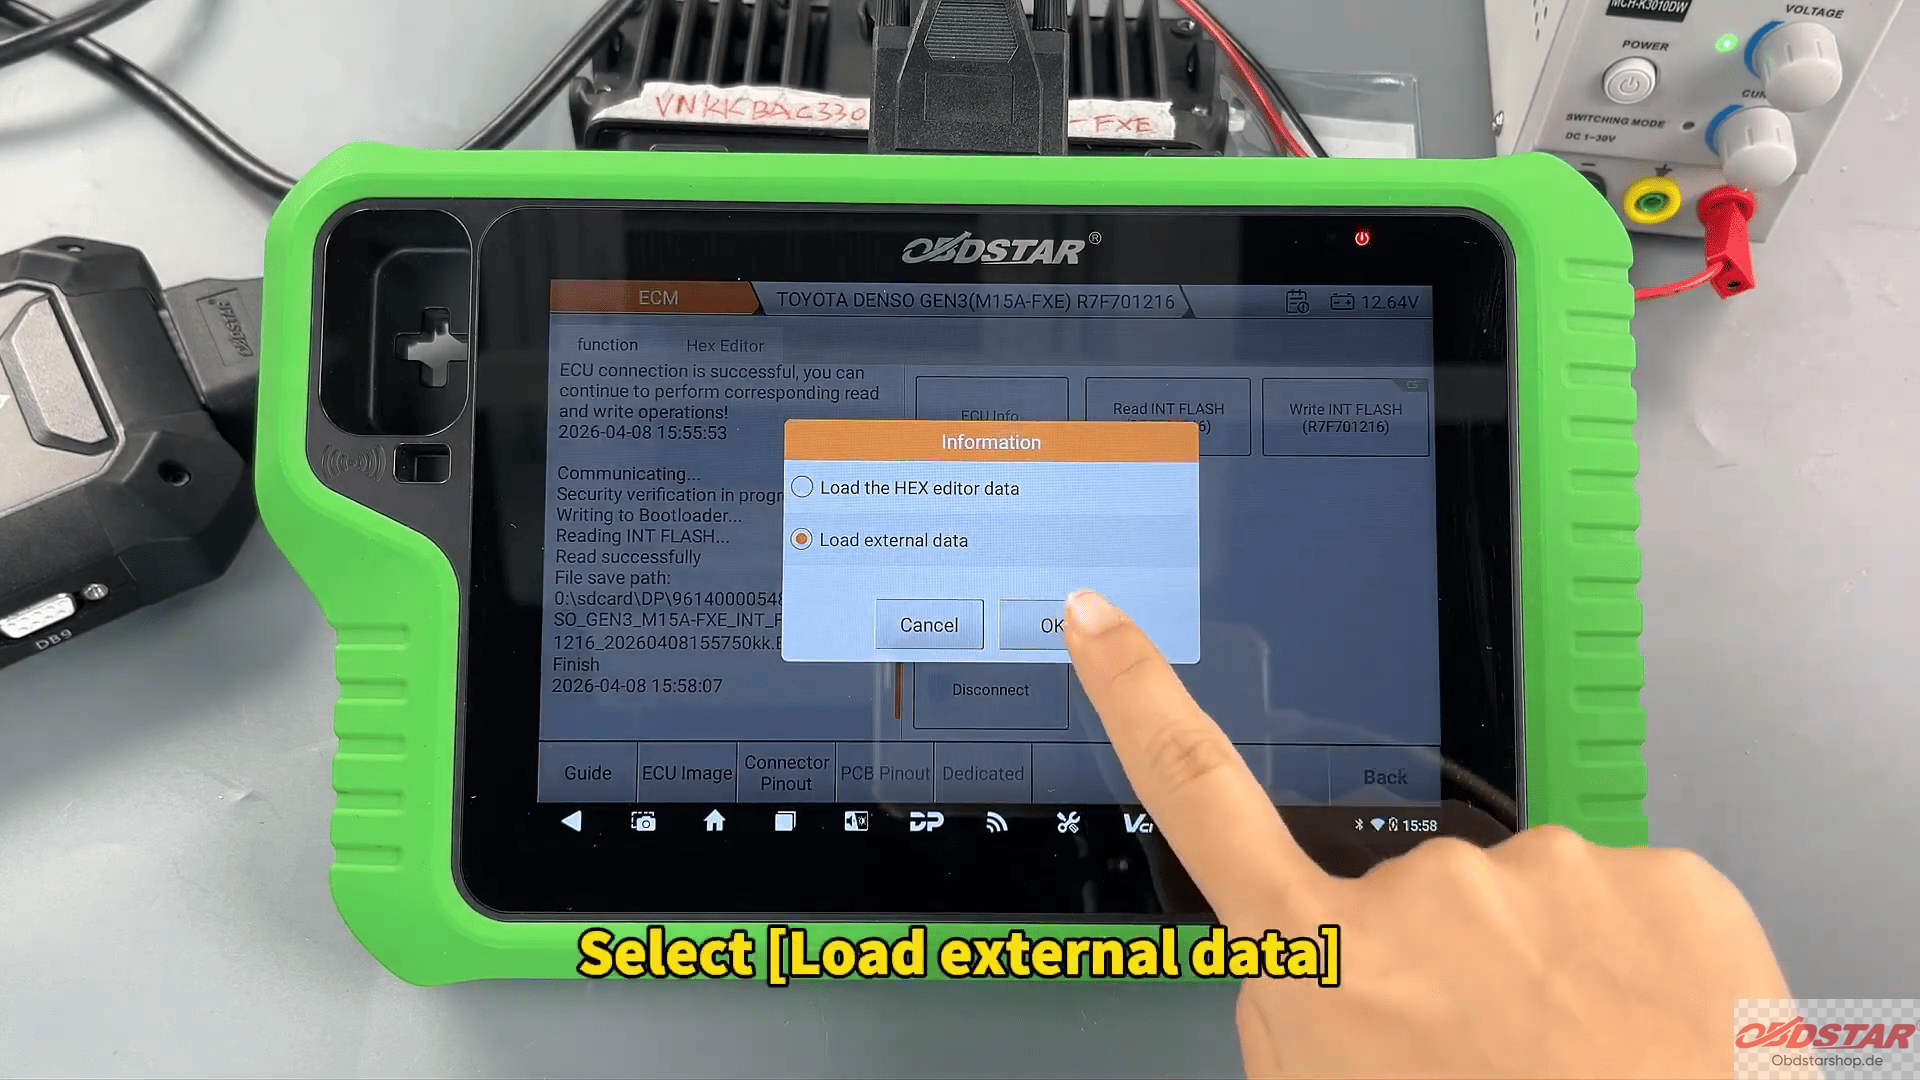
Step 5: Write FLASH Data
Select [Load External Data] and locate the backup file by file name, time, size, or search function.

After selecting the correct file:
Tap [OK]
If the data has not been modified, select [No] when asked about checksum calculation.
When the screen displays Write Successful, the operation is complete
This is a practical and efficient solution for Toyota GEN3 ECU read/write operations using OBDSTAR X300 Classic G3.
Read also:
How to Program a Key for 2019 Roewe i5 Using KeyMaster G3
KeyMaster G3 to Program 2025 Infiniti QX60 Smart Key Trying
Leave a Reply