




This guide demonstrates how to read and write Mercedes-Benz VGS2-NAG2 data using KEYMASTER G3.
Required Equipment
- OBDSTAR X300 Classic G3
- High-Power DC Power Supply
- Main Cable
- TCM-012 Adapter
- Mercedes-Benz VGS2-NAG2 TCM
Note: Make sure your KEYMASTER G3 software has been updated to the latest version before beginning the operation.
1. Enter ECU Flasher
Power on the OBDSTAR G3 and select [ECU Flasher] → [TCM]
Search for the corresponding VGS2-NAG2 model from the search box in the upper-right corner.
Tap Start.
2. Configure BENCH Connection
Select [BENCH Mode]
Corresponding OBDSTAR TCM-012
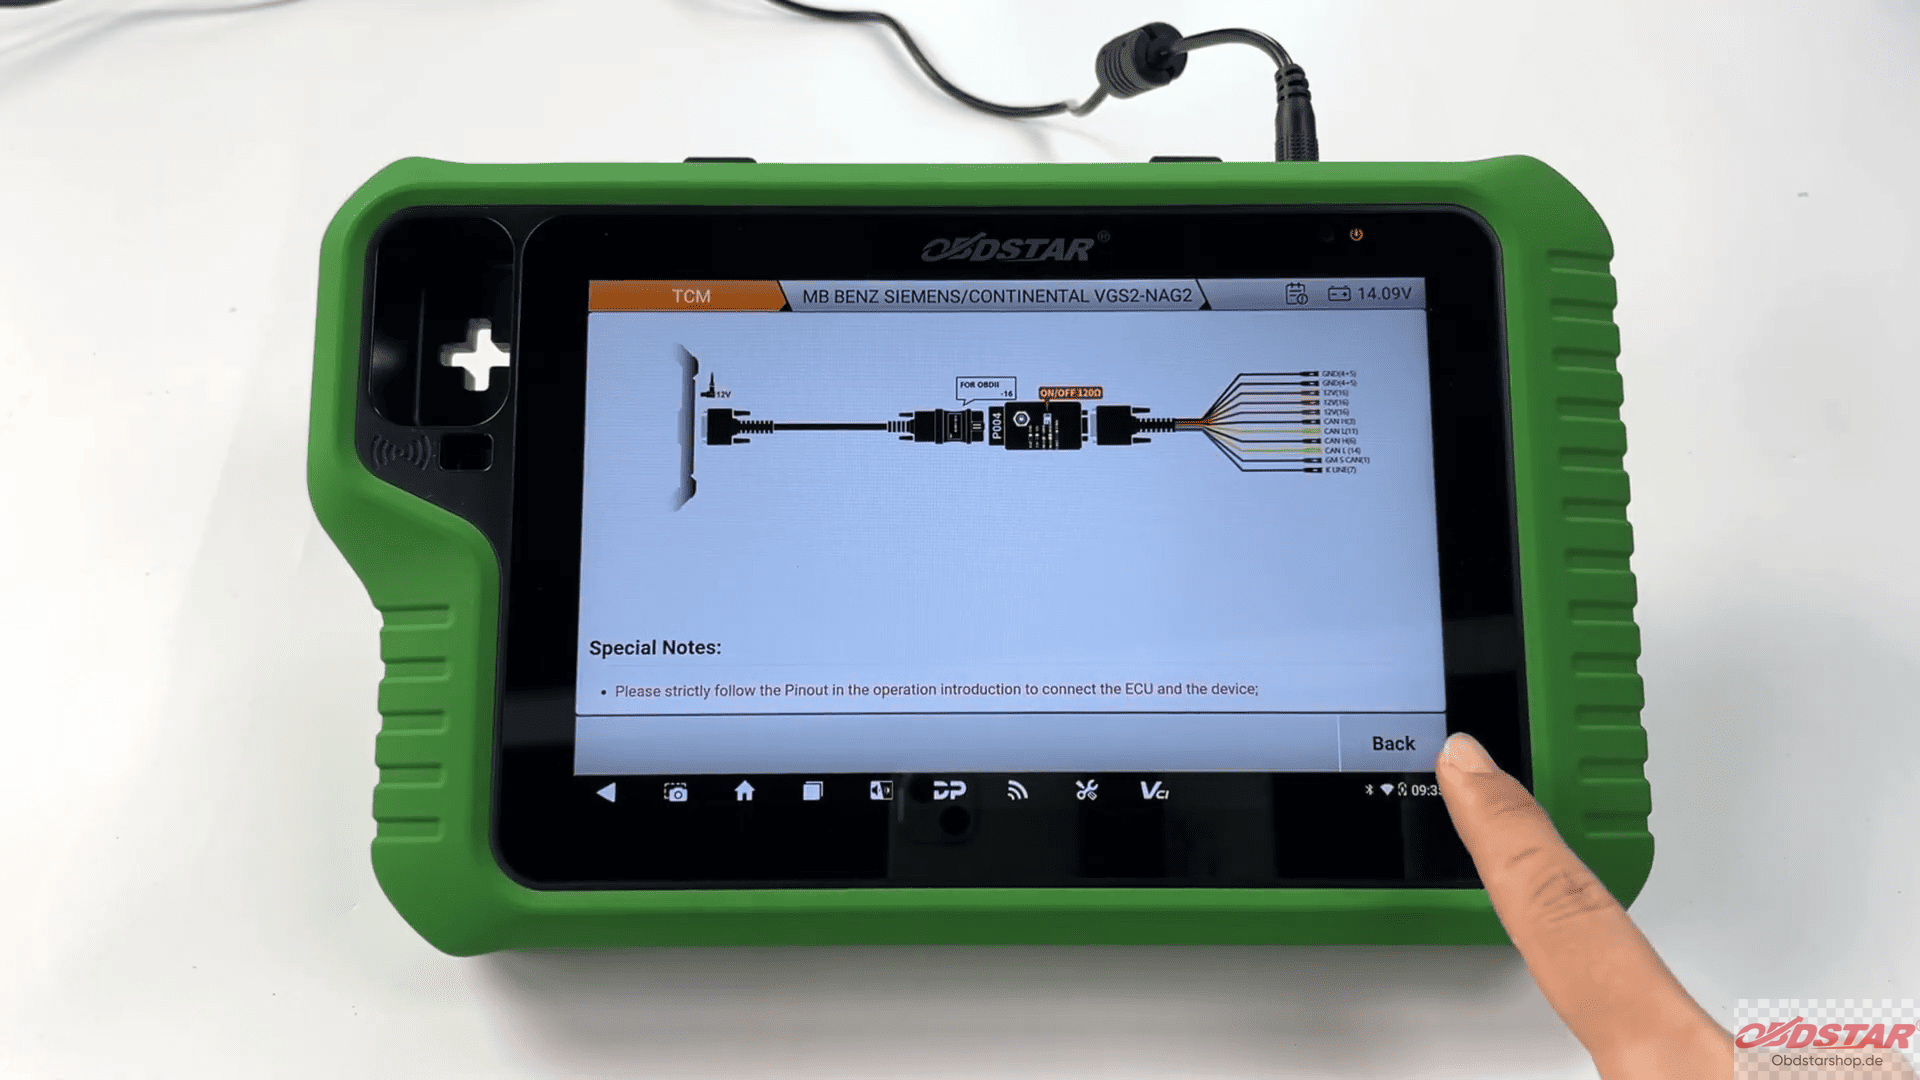
Before wiring the module, tap Guide to view the operation instructions and wiring diagrams for the selected adapter.
Return to the previous screen when finished.
3. Verify the Module
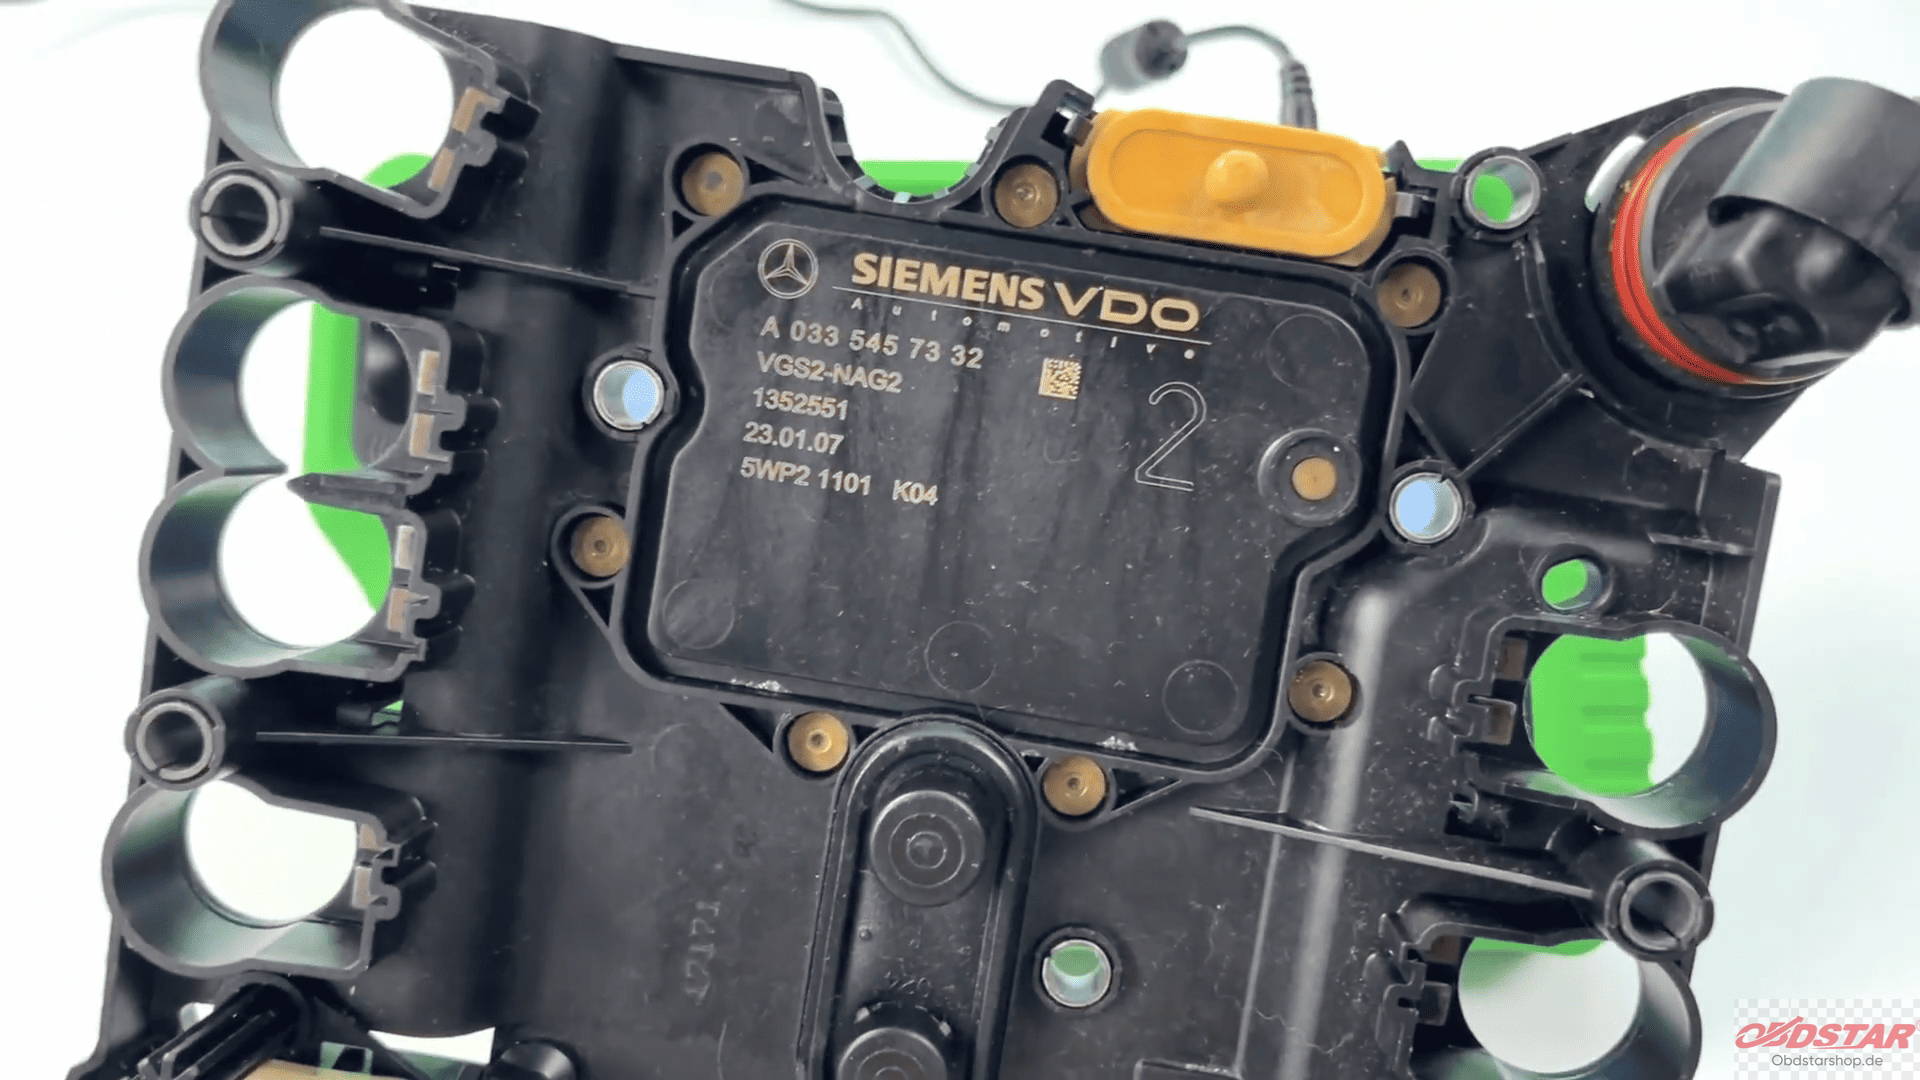
Tap ECU Image to compare the displayed module with the physical TCM.
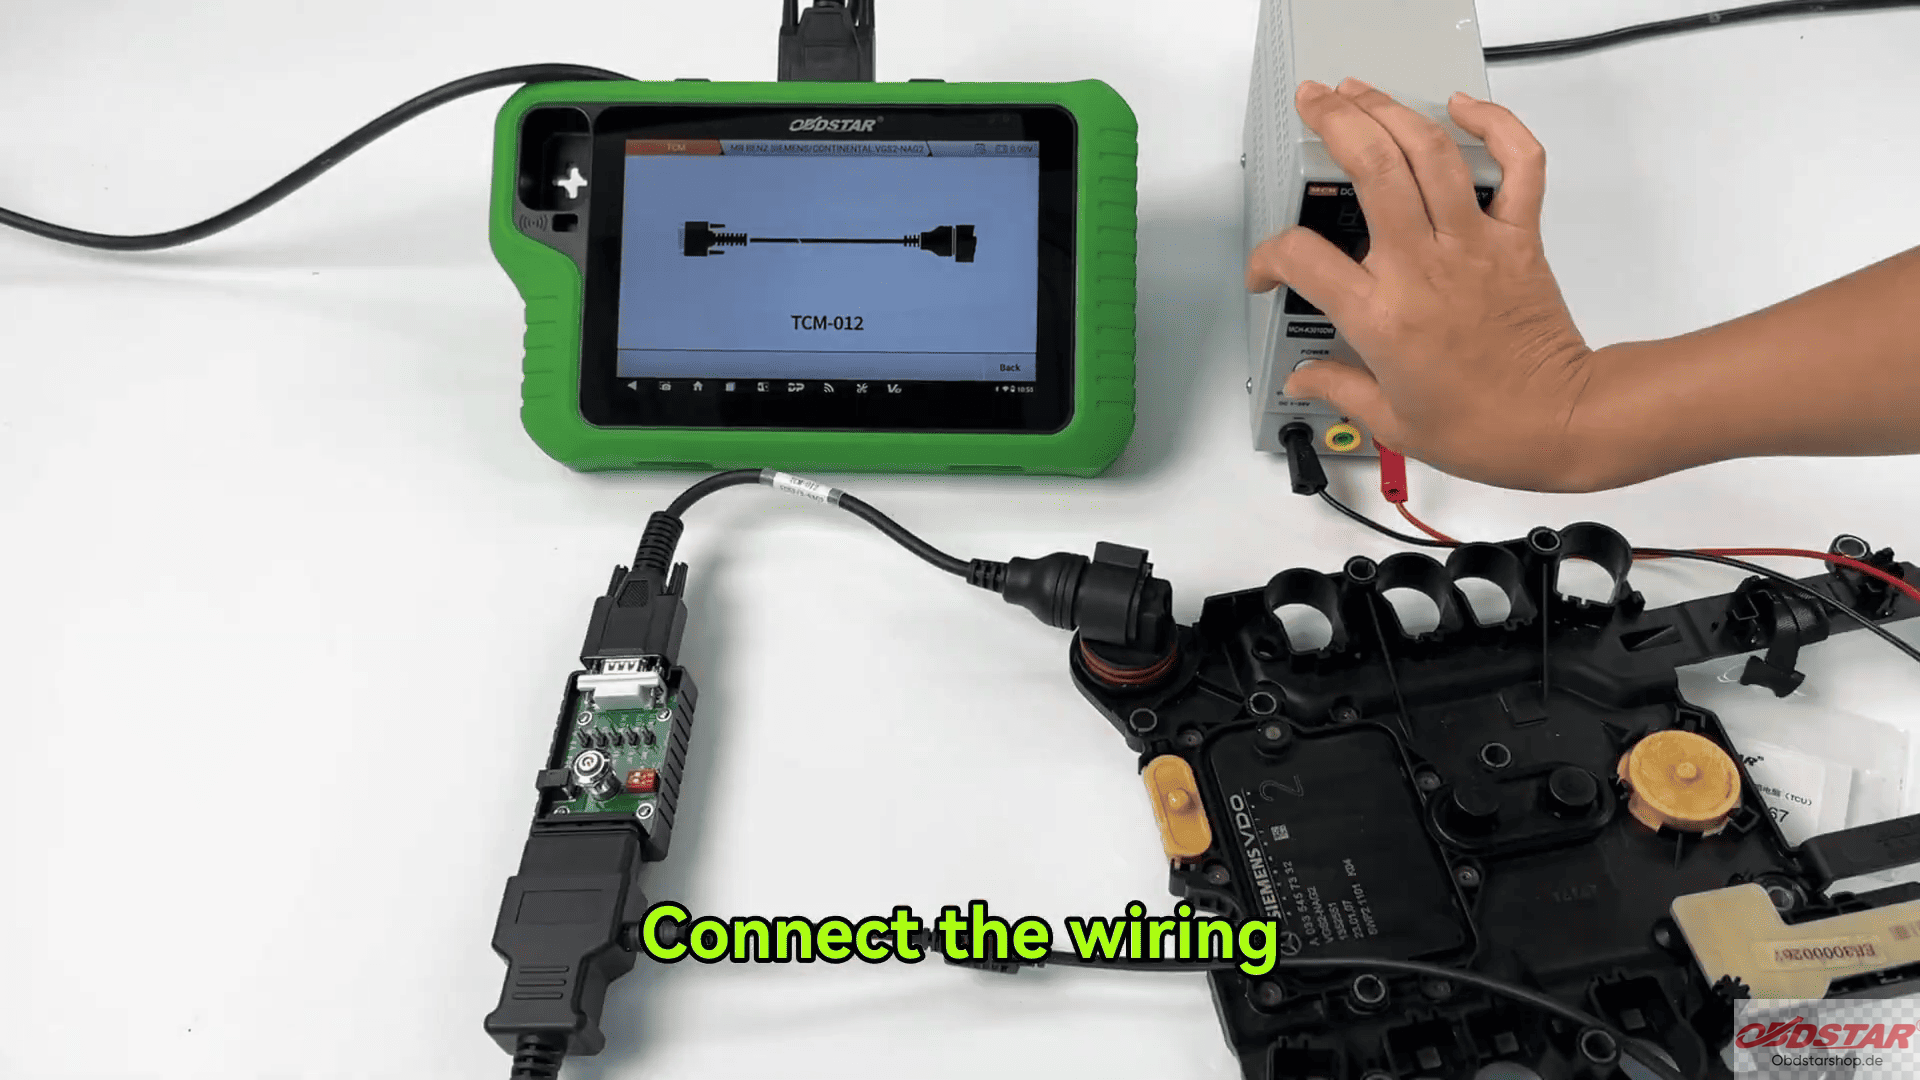
Next, tap Connector Pinout, choose Dedicated, and connect the wiring according to the pinout diagram.
After confirming the wiring is correct, tap Connect and follow the on-screen instructions.
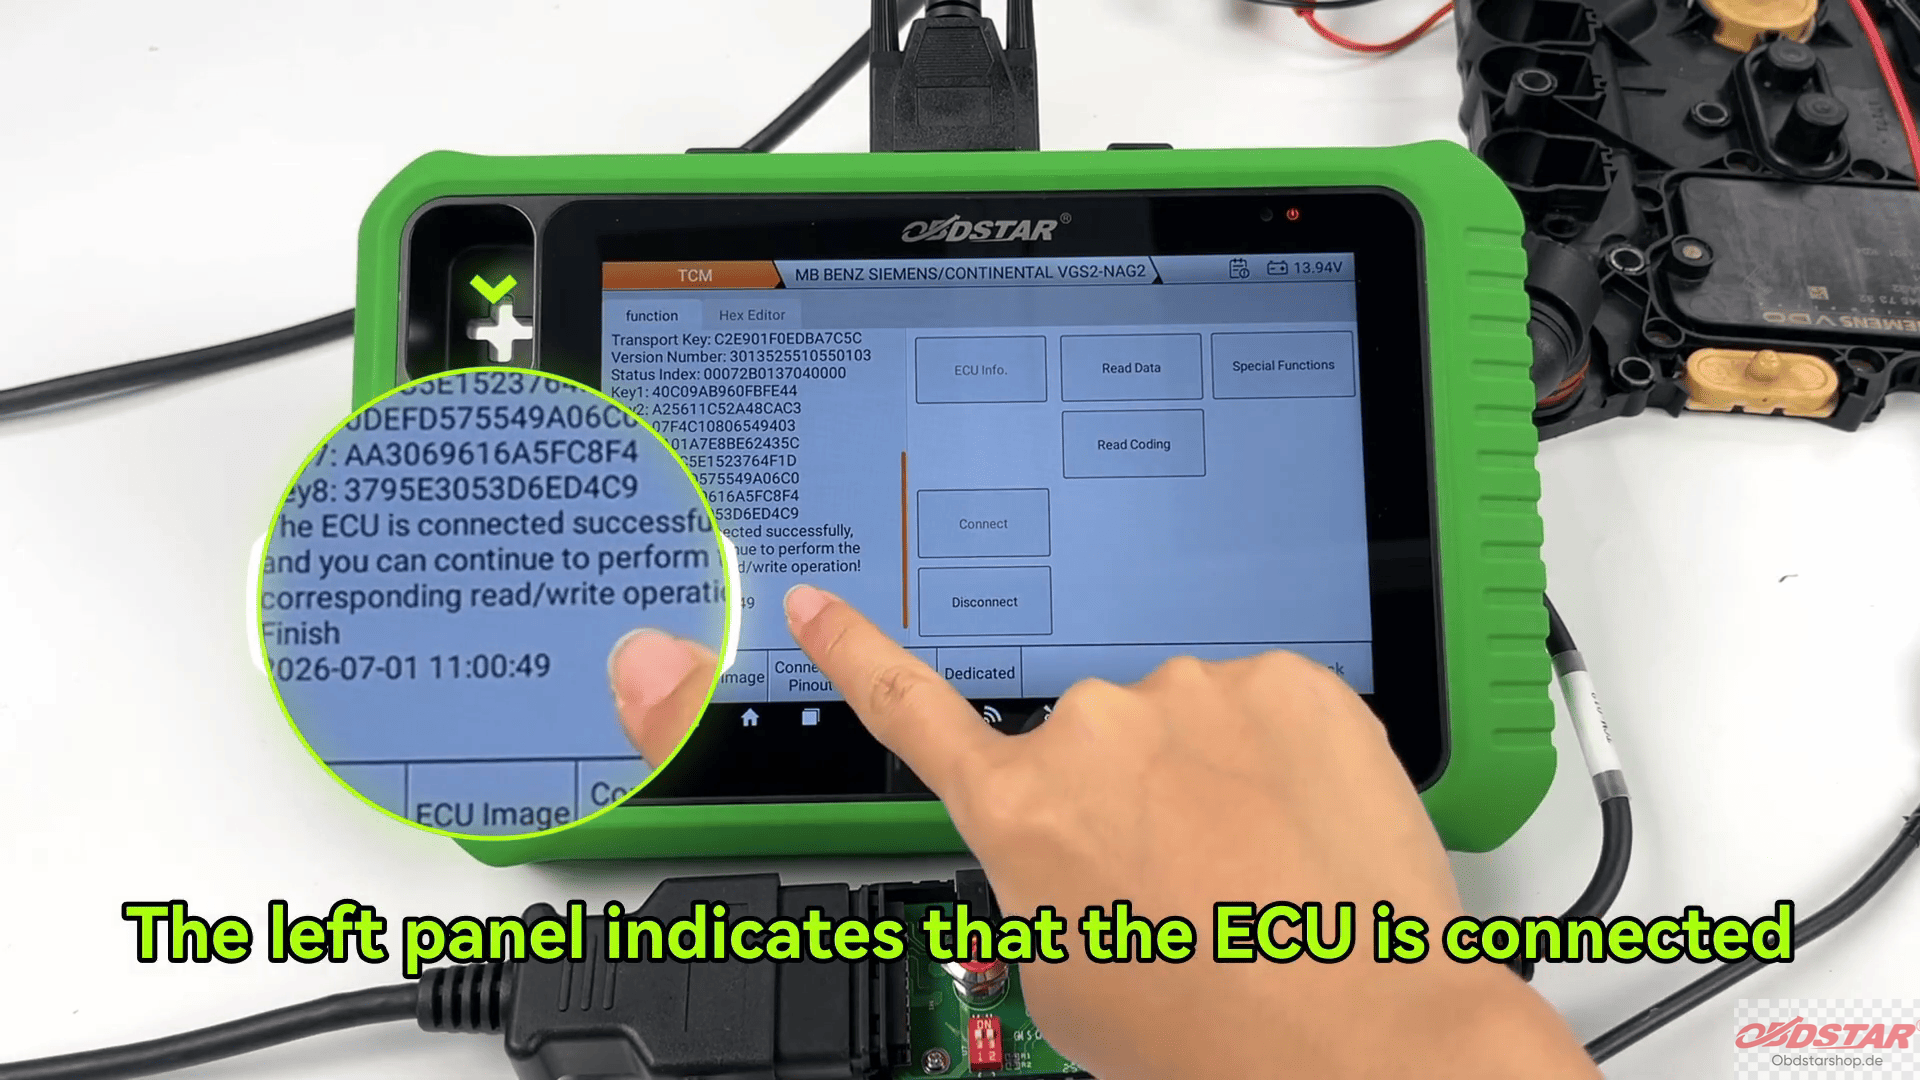
Once communication is established, the left-side status panel will indicate that the TCM is connected successfully.
4. Read TCM Data
Select Read Data.
Follow the prompts to read the transmission control module data.
After the operation is complete
- Rename the backup file if necessary.
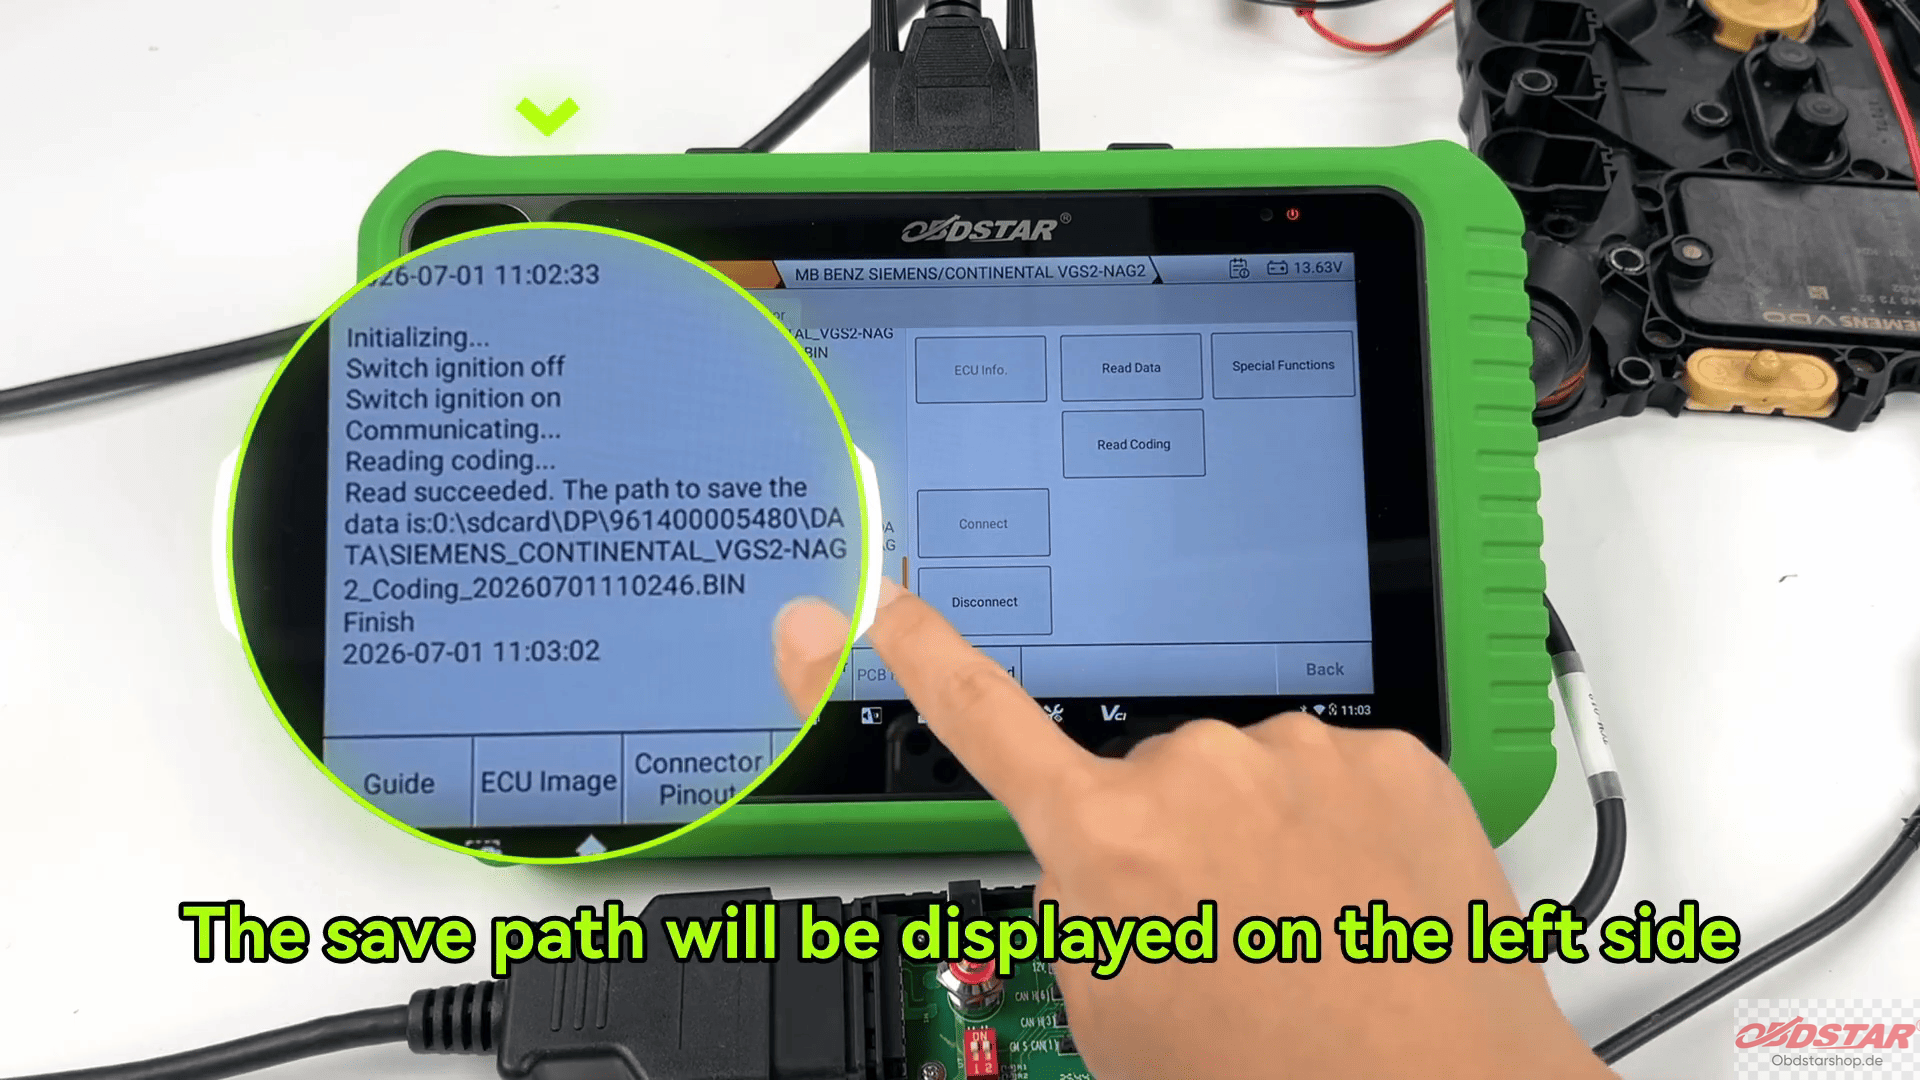
- The save path will be displayed on the left side of the screen.
Creating a complete backup is recommended before performing any write operation.
5. Read Coding Information
Return to the menu and select Read Coding.
The coding information can also be renamed and saved for future restoration.
The storage location is displayed automatically after the reading process is completed.
6. Activate the TCM
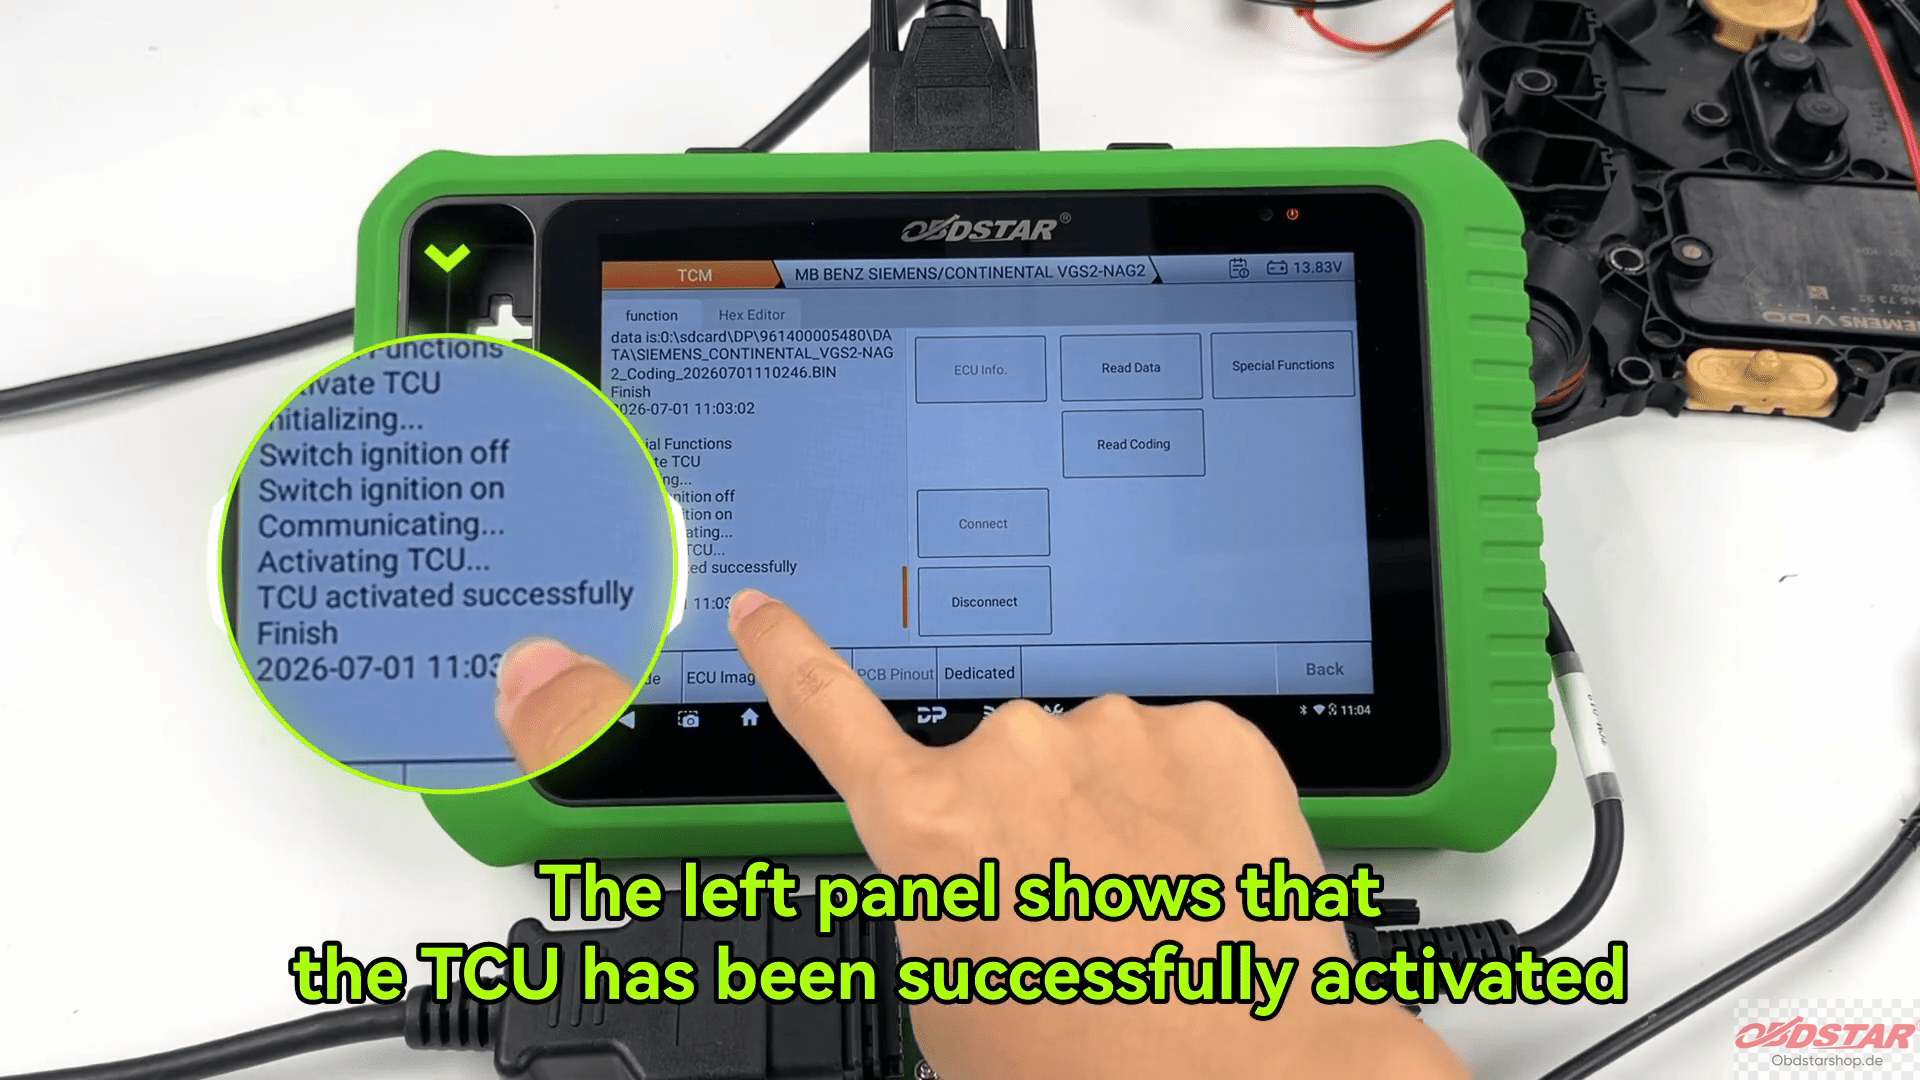
Open Special Functions and select Activate TCU.
Operate the power switch according to the on-screen instructions.
After activation, the status panel confirms that the TCU has been successfully activated.
7. Reset Virgin
To prepare the TCM for adaptation or replacement, return to Special Functions and select:
Reset Virgin (Renew)
Follow the device prompts and switch the power as instructed.
When the process is complete, the software will indicate that the renewal operation has been completed successfully.
8. Transfer Personalization Data:
Open Special Functions and select
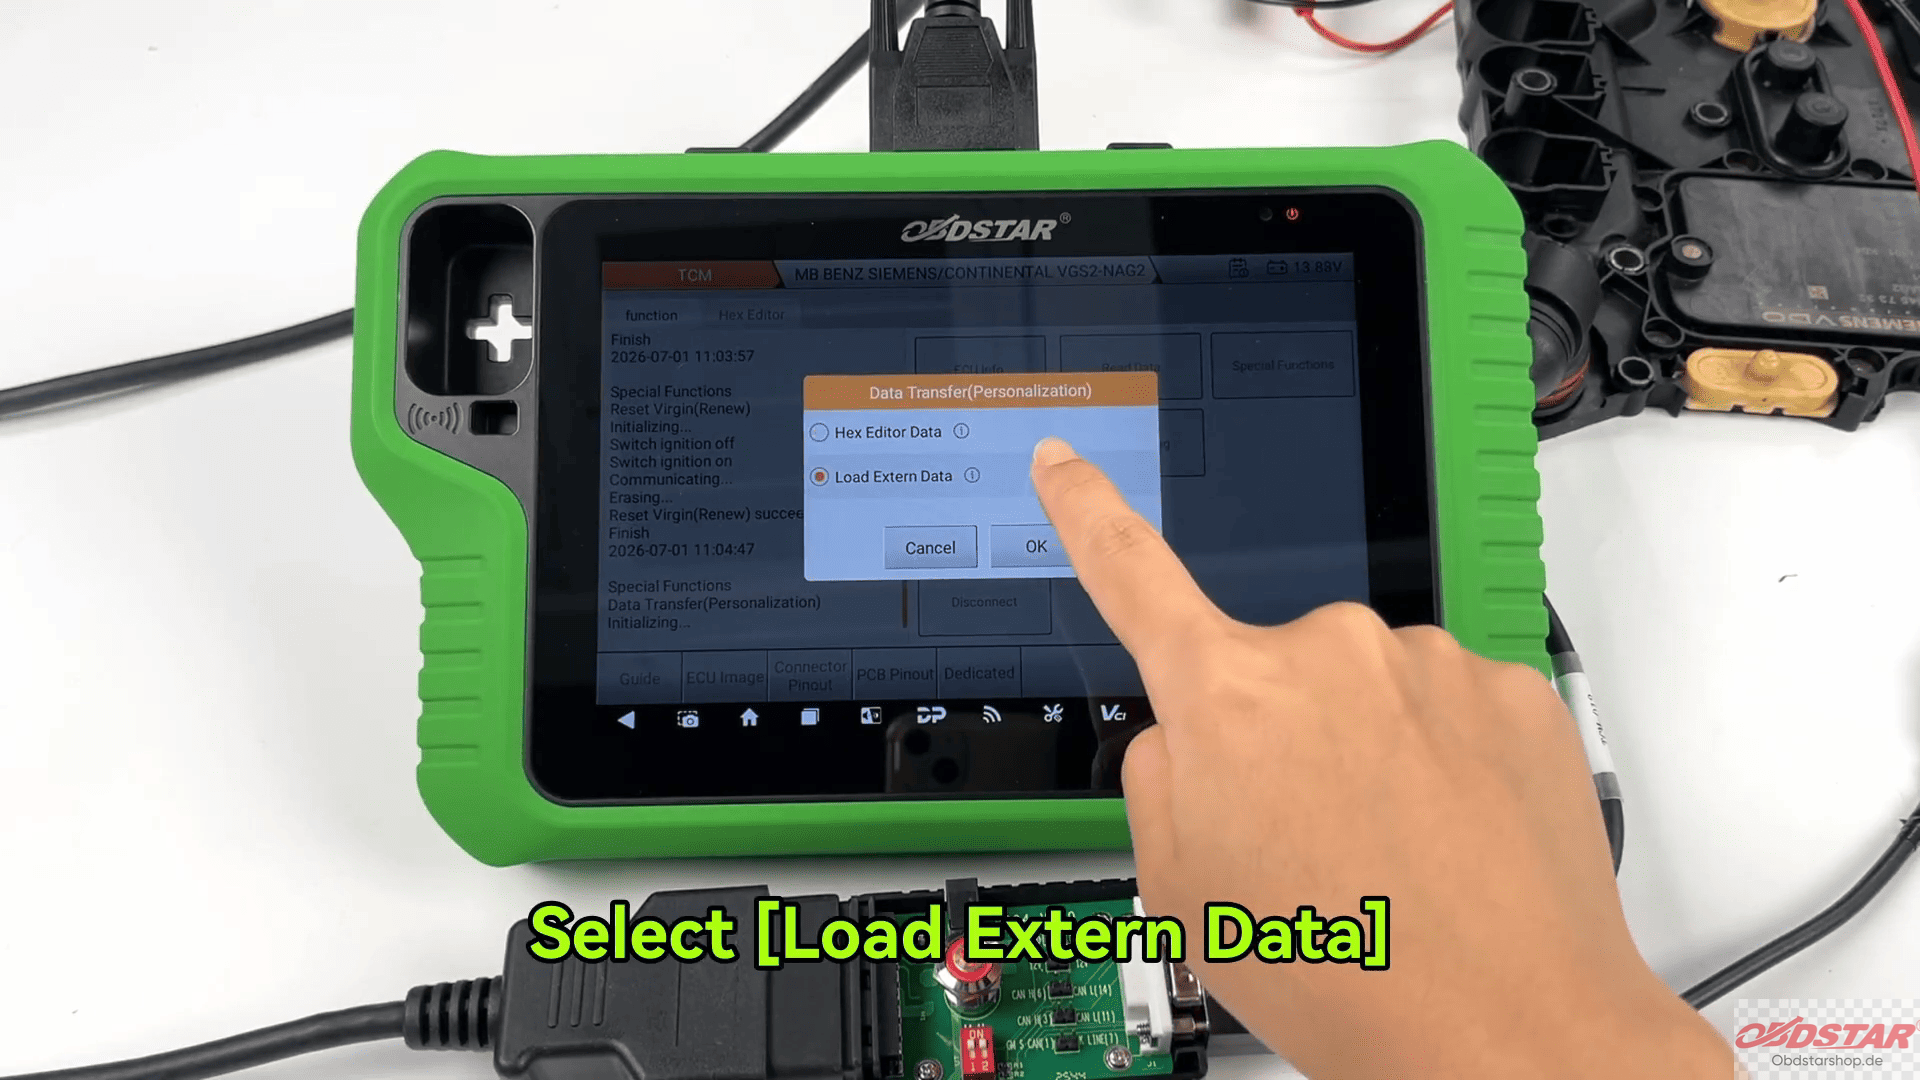
- Data Transfer (Personalization)
- Choose Load External Data.
Locate the previously saved file using
- File name
- Creation time
- Search function
Verify the selected data before writing.
Follow the on-screen instructions to complete the personalization process.
Once finished, the left status panel will confirm that personalization has been completed successfully.
9. Write Coding
Return to Special Functions and select Write Coding.
Choose Load External Data, then locate the desired coding backup.
Follow the device prompts to write the coding information.
After completion, the software confirms that coding has been written successfully.
10. Modify the VIN
Select Write VIN under Special Functions.
Follow the prompts and enter the new Vehicle Identification Number (VIN).
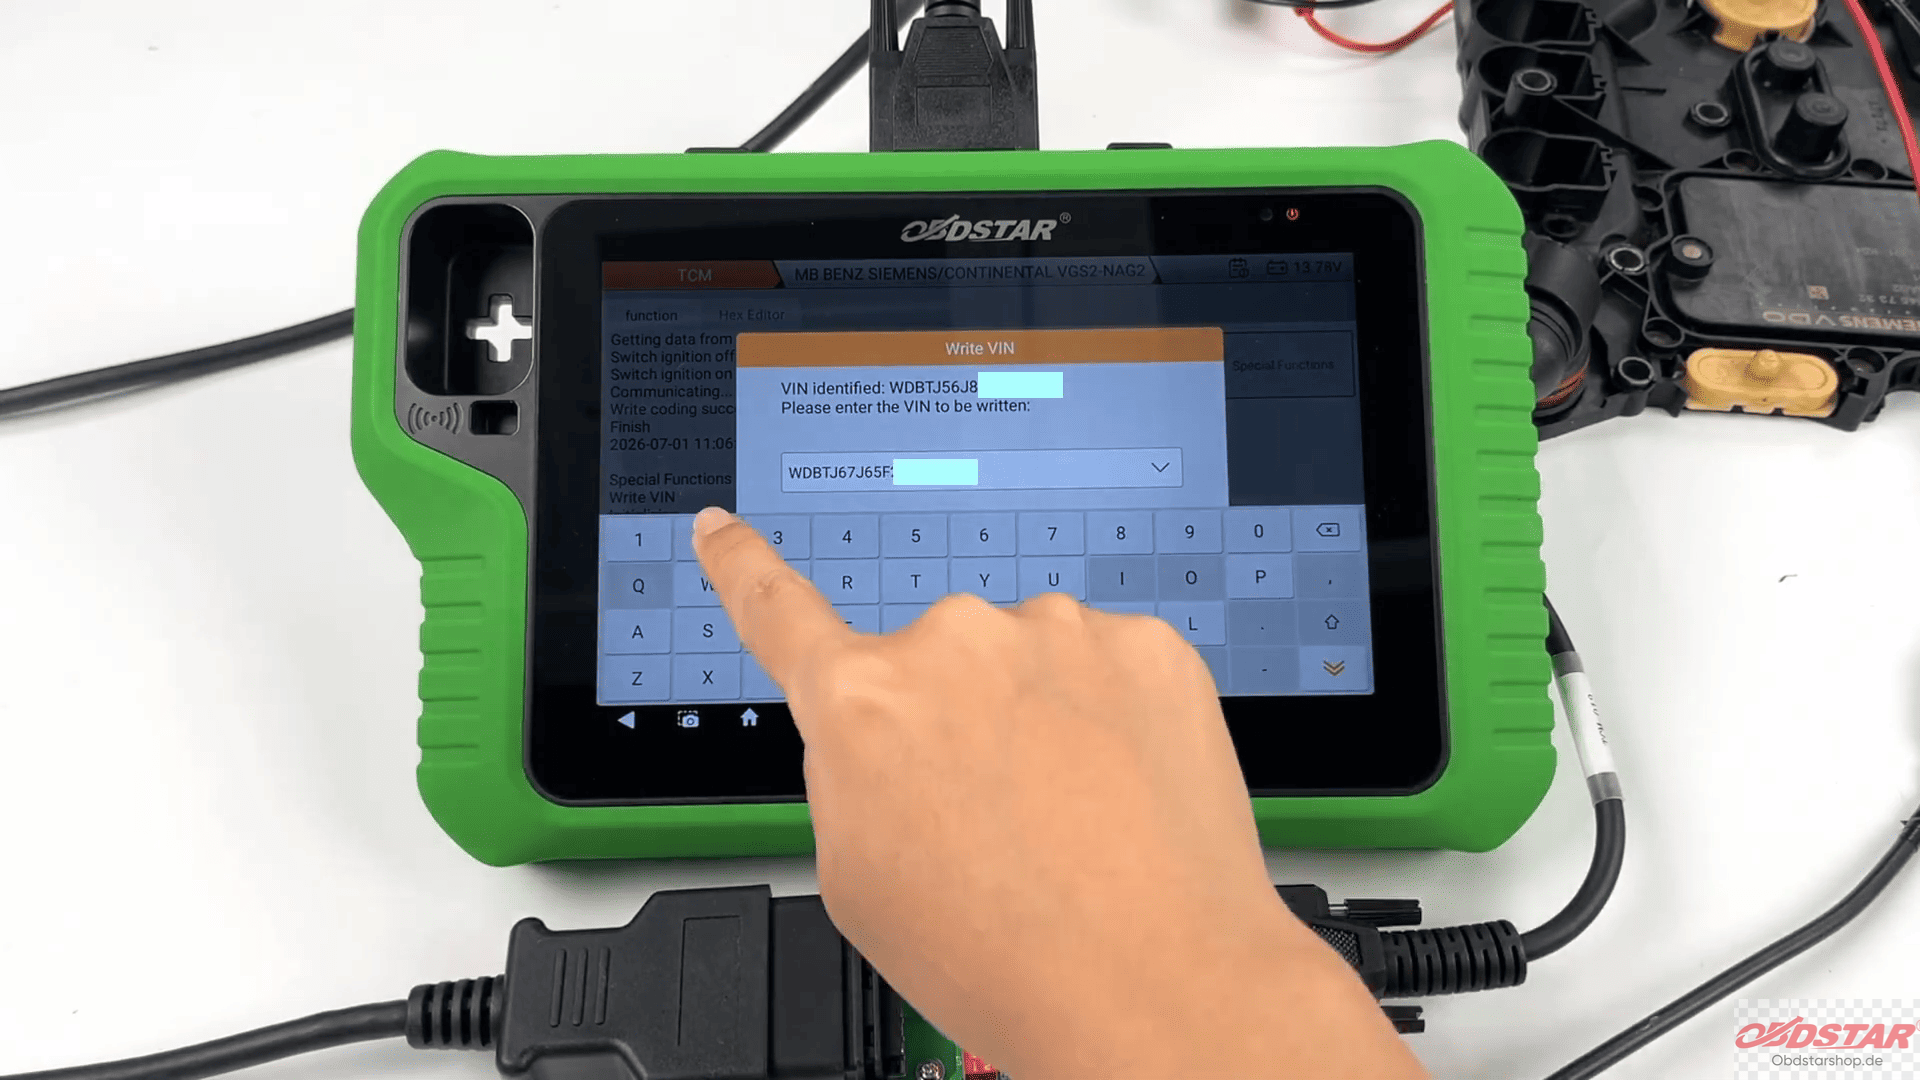
Operate the power switch when requested.
Once the procedure is complete, the device will display VIN Write Successful.
11. Finish the Operation
After all programming procedures have been completed:
- Disconnect the wiring.
- Turn off the external power supply.
- Remove the TCM safely.
The Mercedes-Benz VGS2-NAG2 programming procedure is now complete.
Read also:
How to Read & Write Audi ECU Data with KEYMASTER G3
Leave a Reply